1 min to read
How to display multiple clocks on windows?
If you frequently communicate or work with people in different time zones, you may find it useful to have multiple clocks on your Windows desktop. This can help you keep track of time differences and avoid confusion when scheduling meetings or calls. Here are the steps to display multiple clocks on Windows:
Step 1: Open the Date and Time settings
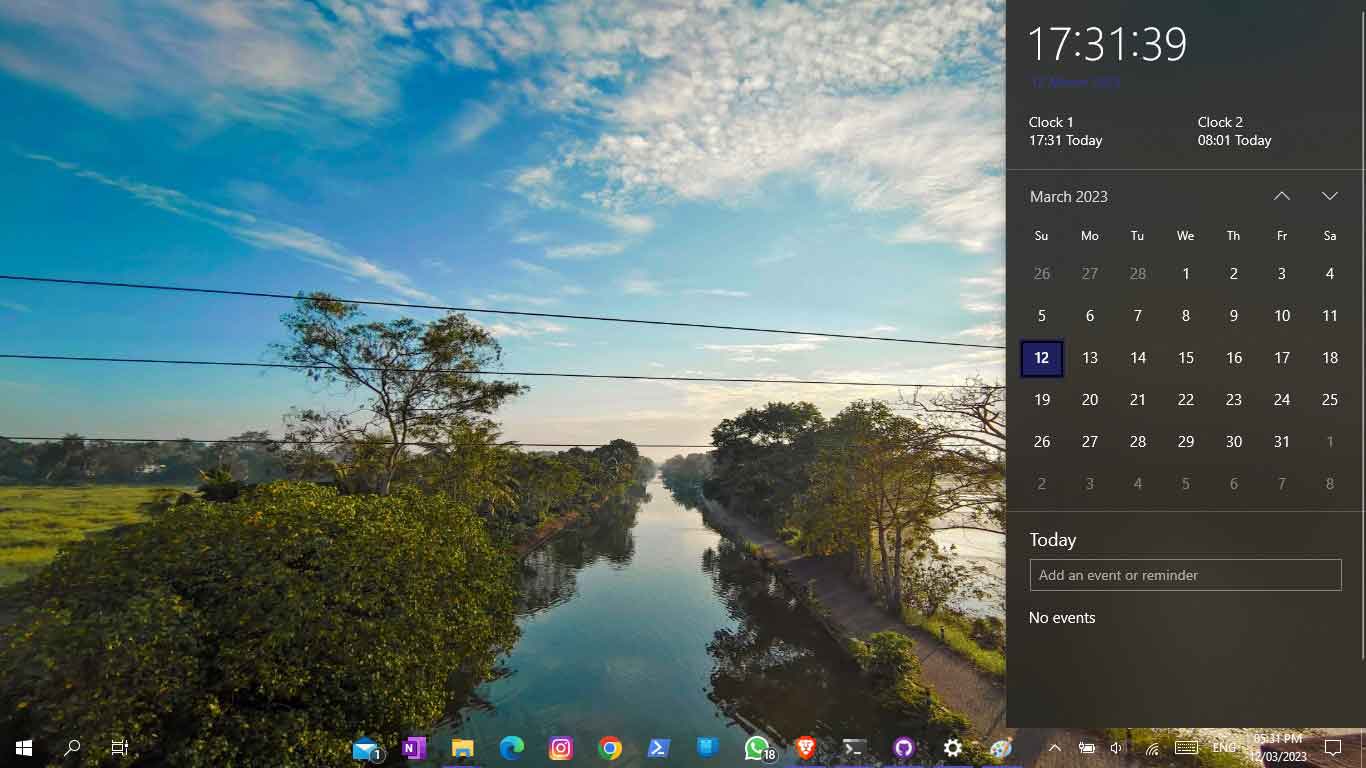
Click on the date and time display in the bottom right corner of your desktop. This will open the calendar and time display.
Step 2: Click on “Date and time settings”
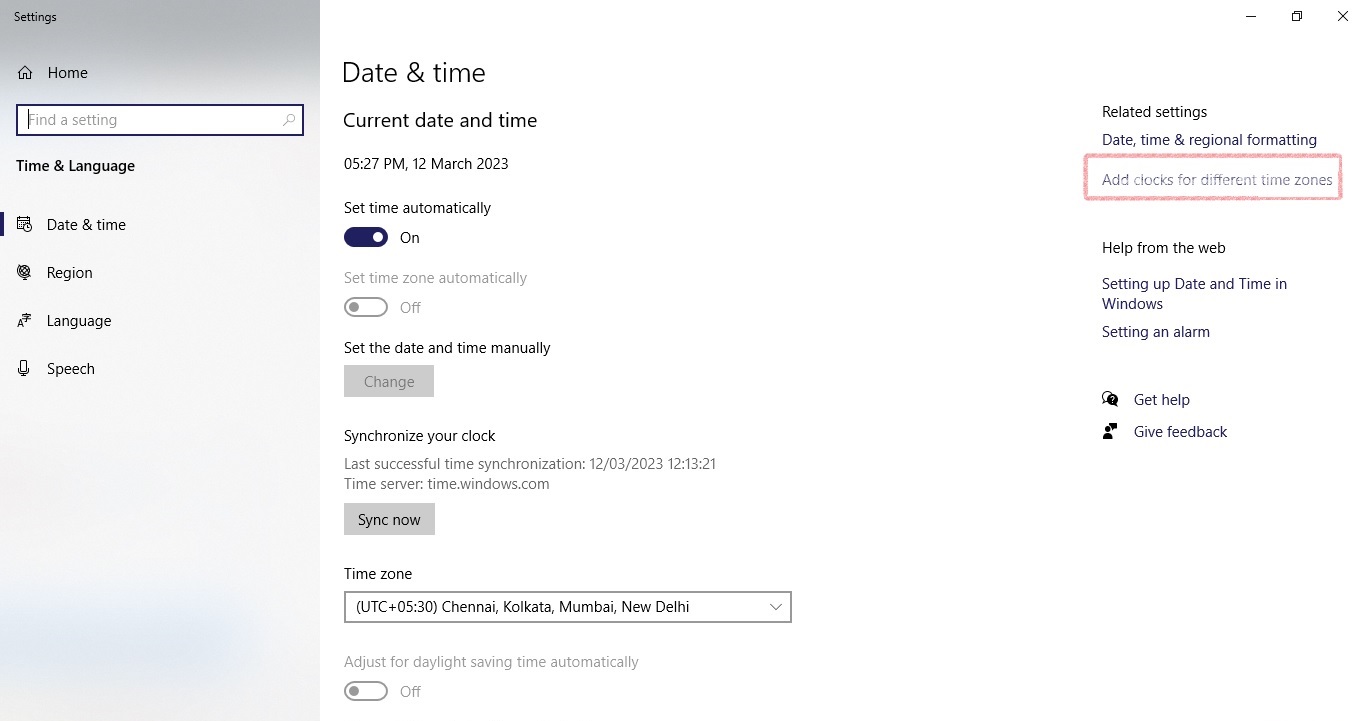
At the bottom of the calendar and time display, click on “Date and time settings” to open the Date & Time settings window.
Step 3: Click on “Add clocks for different time zones”
In the Date & Time settings window, click on “Add clocks for different time zones” under the “Related settings” section.
Step 4: Add a new clock
In the “Additional Clocks” tab, click on “Show this clock” and select a time zone from the drop-down menu. You can also enter a name for the clock in the “Enter display name” field.
Repeat this step to add additional clocks for other time zones.
Step 5: Save your changes
Once you have added all the clocks you need, click on “Apply” and then “OK” to save your changes.
Step 6: View the clocks
To view the clocks you have added, click on the date and time display in the bottom right corner of your desktop. This will open the calendar and time display, and you will see the additional clocks you have added.
You can hover over each clock to see the time in that time zone, and click on the clock to see a larger display with more information.
By following the steps outlined above, you can easily add and view multiple clocks on your Windows desktop.


Comments